Capturing and Editing Instagram Photos
Now that we’ve explored what you can post on Instagram, let’s review some ways to make sure your content is successful. Unlike other social media platforms, Instagram’s simple profile layout forces you to focus on the quality of content … not the quantity.
While this is great for engagement, it also means that you can’t hide mediocre content. Do your very best to use high-resolution images on your Instagram feed.
Square images should be 1080 x 1080px. Landscape images should be 1080 x 566px, and profile images should be 1350 x 1080px. Regardless of what size you upload, every image will be shown as a square in your profile feed.
How to Take a Great Photo With Your Smartphone
You might be thinking How am I supposed to capture the perfect, high-quality shot without a high-quality camera? No worries! Phone camera technology has become so advanced that it now rivals thousand-dollar cameras.
Amazing photography is no longer limited to those with professional cameras. You (yes, you!) can take eye-catching photos your audience will love using a tool you already have in your hands. Here are some tips to drive follower growth and Instagram engagement.
1. Follow the rule of thirds.
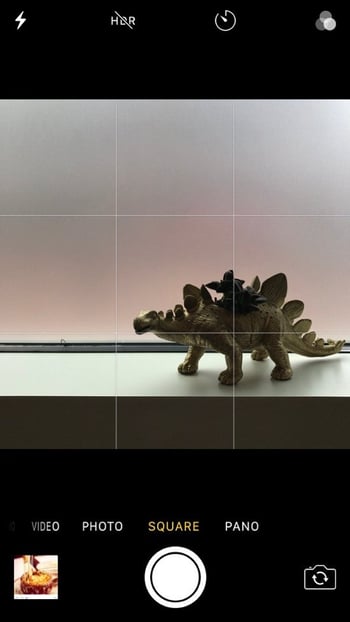
To instantly improve your photo composition, turn on your camera grid lines. Aim to place your subject at the intersection of one set of vertical and horizontal lines. This technique, known as the rule of thirds, is popular among painters, illustrators, and photographers.
Placing your subject off-center creates a slight imbalance that catches your viewer’s eye. To turn on your grid lines (on an iPhone), go to Settings > Photos & Camera and switch Grid to on.
2. Focus on a single subject.
To instantly improve your photo composition, turn on your camera grid lines. Aim to place your subject at the intersection of one set of vertical and horizontal lines. This technique, known as the rule of thirds, is popular among painters, illustrators, and photographers.
Placing your subject off-center creates a slight imbalance that catches your viewer’s eye. To turn on your grid lines (on an iPhone), go to Settings > Photos & Camera and switch Grid to on.

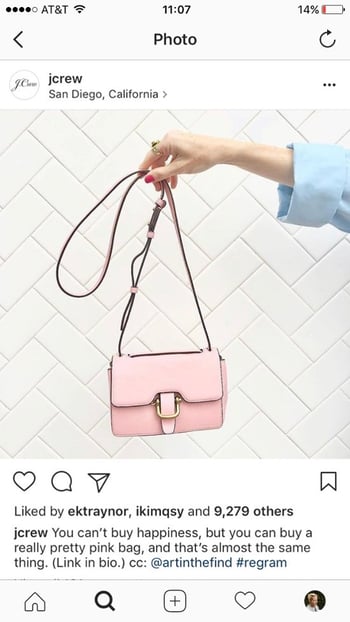
3. Take advantage of negative space.
Negative space is the empty space around your subject. Leaving negative space around your subject will draw attention to the desired focus of your image and prevent it from looking crowded.
4. Look for interesting perspectives.
People are used to seeing the world from eye level. To create interesting and fresh photos, use shots from different perspectives. Change up your shooting perspective to capture a bird’s eye view or worm’s eye view. Experiment with different angles to find new perspectives on common sights.

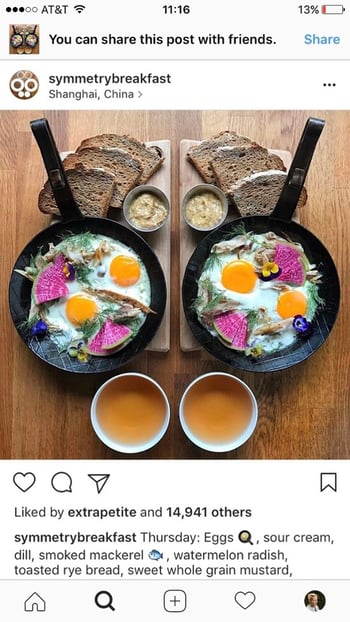
5. Leverage symmetry and patterns.
The human eye is naturally drawn to symmetrical shapes and objects. Sometimes, it’s best to break the rule of thirds and center the scene in your frame. Leading lines are another more specific form of symmetry that pulls the eye into the photo. People are also drawn to patterns. A pattern could be man-made, such as a tiled floor, or natural, such as petals on a flower or vines on a wall. To make things really interesting, break up the pattern with your subject.
6. Use natural light.
Standard overhead lighting creates harsh shadows and highlights that create unwanted dark and light areas in your photos. To prevent this from happening, use soft natural light wherever possible. Try taking photos next to a window, and for outdoor shots, the half-hour just before sunset and after sunrise often offers the most striking lighting as the sun is low on the horizon.

How to Add Filters and Edit Photos
Ever wonder why some photos just look so good? It probably has to do with how it’s edited. Editing photos only takes a few minutes and can massively impact the quality. Thanks to Instagram’s built-in tools and filters, editing photos is very simple. Follow these tips to make that photo of your homemade lunch look like a culinary masterpiece.
First, start with a great photo (using our tips above). No amount of editing can fix photos if they have poor composition or lighting.
Consider using other apps to edit your photo. Facetune 2 is a free editing app that allows you to apply effects like HDR and tonal contrast as well as adjust brightness, contrast, and saturation. VSCO is also another popular editing app with numerous free filters that resemble popular film stocks.
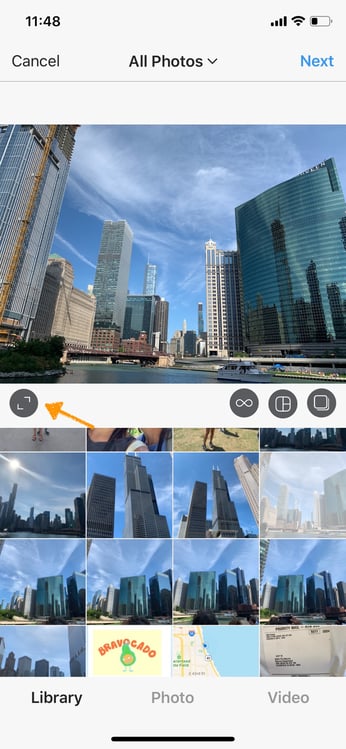
Step 1: Upload your photo and choose a filter.
When you upload your edited photo to Instagram, it’ll automatically crop your photo into a square. To change it back to the original width, press the icon with the two outward-facing arrows. At this stage, you can add additional Instagram filters — but don’t go too crazy. Each Instagram filter has its own personality that can drastically change a photo.
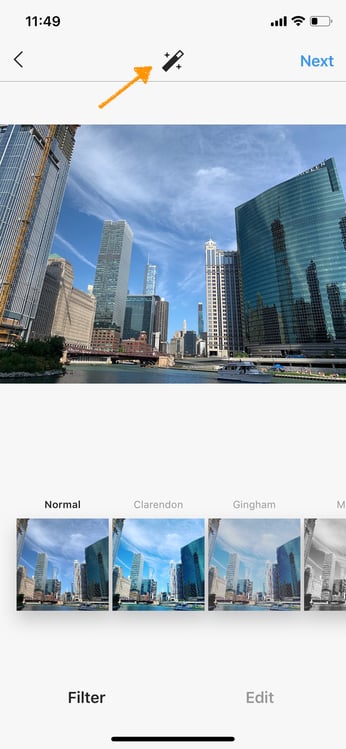
Step 2: Next, try adjusting your photo lux.
According to Instagram, “Lux balances the exposure and provides much-needed brightness” to photos. Lux make can make your image more vibrant and bring out details. To do this, press the wand icon at the top of the screen and adjust the level.
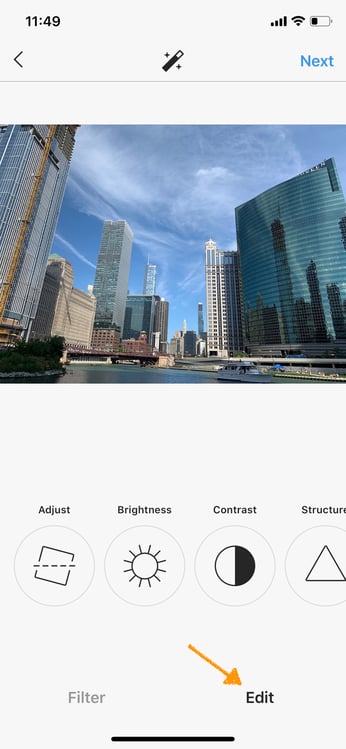
Step 3: Make any final tweaks using Instagram’s editing tools.
Press Edit to adjust your photo’s alignment, brightness, contrast, structure, and more. Press Next when you’re done to add final details and publish.
Videos
Instagram also lets you upload videos — as long as they’re a minute or less in length.
You can download professionally edited videos from your computer or videos you’ve edited in a mobile app. Splice is a free editing tool (from the same guys that made GoPro) that allows you to cut together multiple clips and add transitions, titles, and music.
Instagram videos default to playing without sound. Because of this, make sure at least the first few seconds of your videos don’t need sound to be understood. You can use your caption or prompt viewers to turn on the sound.
Boomerangs
Open your Instagram and tap the camera icon in the top left-hand corner of the home screen. This is the in-app camera. You can also access this by swiping right on the screen.
Notice the settings on the bottom. The Normal setting, to which the camera defaults, takes still photos. You’ll see that the first setting to the right is Boomerang, which takes three-second, looping videos that play forward and backward. (We’ll cover the other settings later in this guide.)
Boomerangs allow you to put a quirky spin on traditional video. Boomerangs created using a burst of photos and stitching them together for a short, repetitive video. These kinds of posts are fun for circumstances like jumping, toasting glasses, or high-fiving.
You can also download Instagram’s Boomerang app to have a separate place to capture boomerang videos.
Hyperlapse
Do you have a video that’s too long for Instagram? Check out Hyperlapse from Instagram, which allows you to condense lengthy videos into shorter, post-able content.
It creates smooth, time-lapse videos with built-in stabilization. To create your own Hyperlapse videos, download the app and give it to access your camera. Tap the circle once to stop and start your recordings. Once you’re done recording, you can choose a playback speed between 1x and 12x. Save the final Hyperlapse video to your camera roll to upload later.
Instagram Reels
A direct competitor of the viral sensation TikTok, Reels is one of the newest Instagram features. Users can create fun, captivating 15 or 30-second loops of content for nearly any purpose. Quick tutorials, dance challenges, and informational videos all find a place in Reels.
Reels have their own explore page filled with content created using this feature. Regular videos, images, stories, and IG TV posts won’t show up here, so your business could have a great opportunity to see engagement from your audience with this content type.
How to Post to Instagram Reels
Step 1: Open the Reels Feature.
Tap the plus icon at the top of the home screen. Then, tap Reels at the bottom right of the screen.

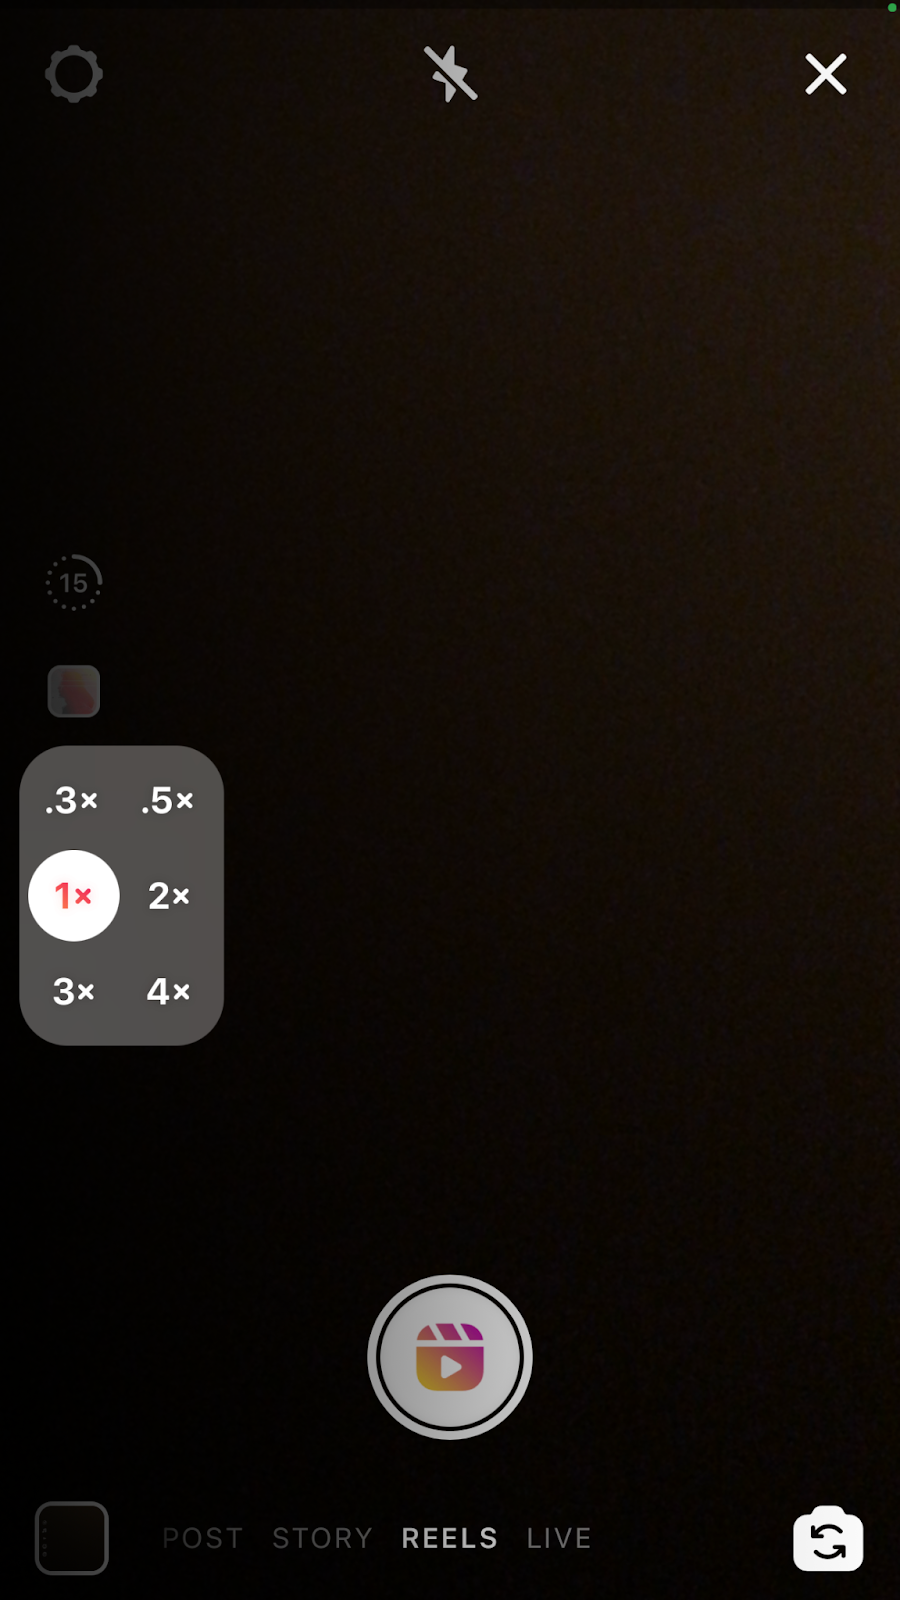
Step 2: Adjust your settings.
There are five customizable settings you can configure before recording your Reel.
Timing
Select either a 15 or 30-second Reel.
Music
Choose music from your favorite artists and genres by searching the song or composer in the search bar.
Speed
Create a slow-mo or sped-up version of your Reel by selecting a slower or faster pace for the recording.
Effects
Apply any filters or effects to your Reel recording.
Timer
Set a timer to self-record a Reel. The feature will give a three or ten-second countdown before the Reel recording begins.
Step 3: Record your Reel.
Record your first clip of the Reel by tapping the clapperboard icon in the middle of the screen. You only need to tap this button once for the camera to begin recording. Tap the button again to pause the recording and switch to a new scene. To view how much time is left available to record in the Reel, check the progress bar at the top of the screen.
Step 4. Finalize the Reel.
Tap the right arrow on the right side of the clapperboard icon to review your Reel. After reviewing it, you can go back to edit it by selecting the arrow in the top left corner. If you’re satisfied with your Reel, select Share To at the bottom right of the screen.
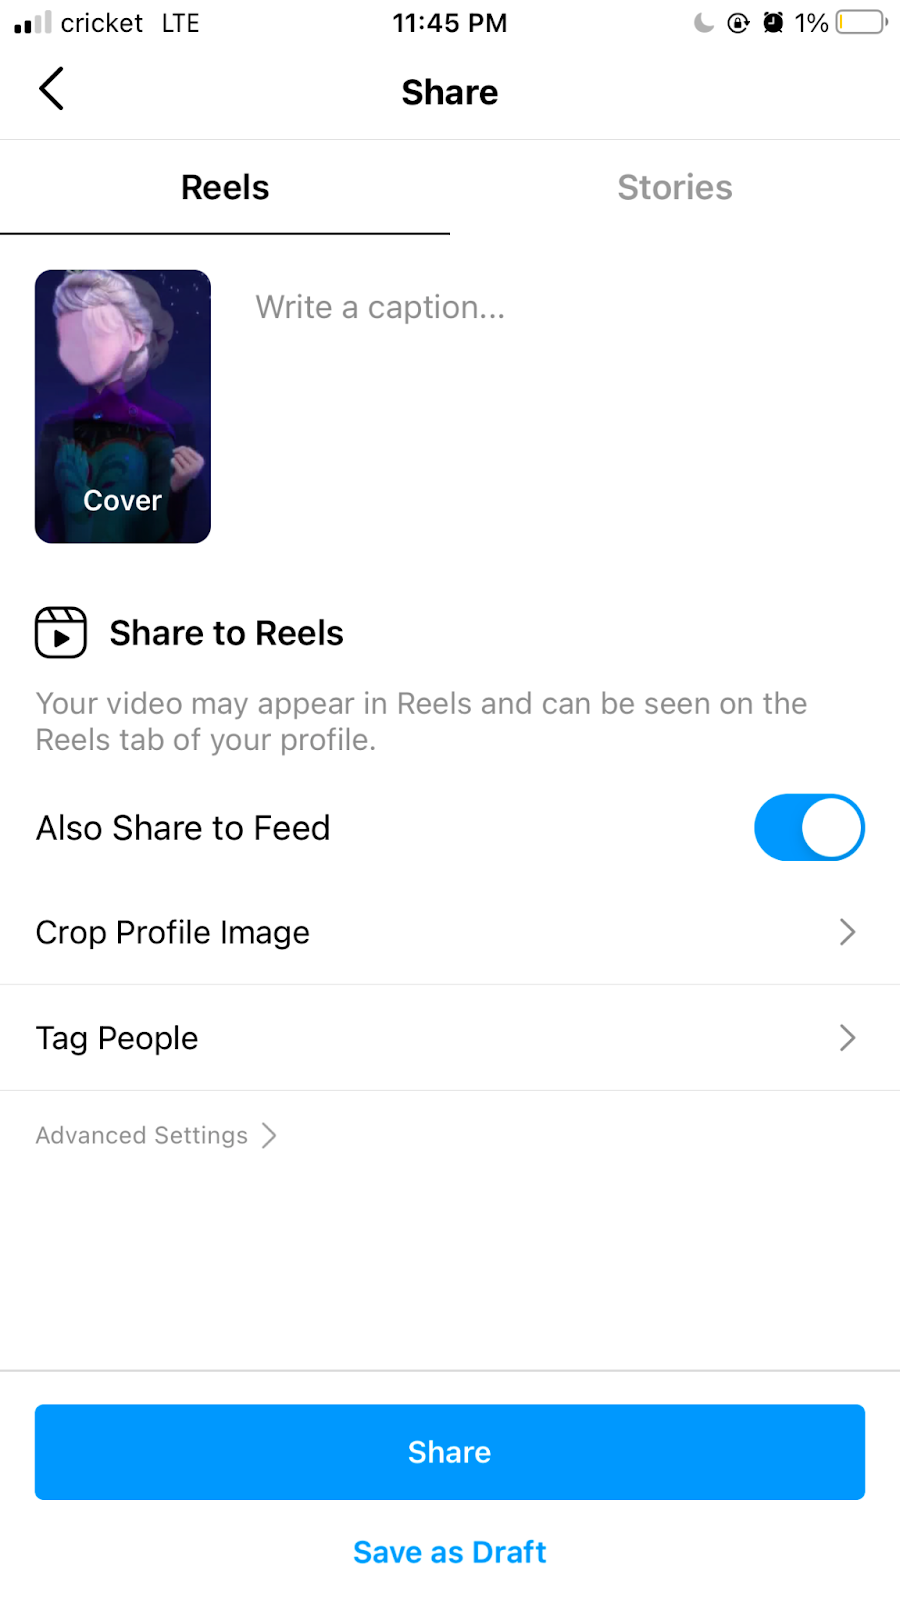
Step 5: Share your Reel.
Create a caption for your Reel and decide where to share it. The sharing options include:
- Share to Reels
- Share to Feed
Share to Reels.
Here, your Reel will appear publicly on the dedicated Reels page. You can also toggle the Also Share to Feed button on to share the Reel to your feed. Tag people, crop the profile image for the Reel, or include a business partner with additional settings. If you’re not ready to post the Reel yet, save it as a draft to publish later.
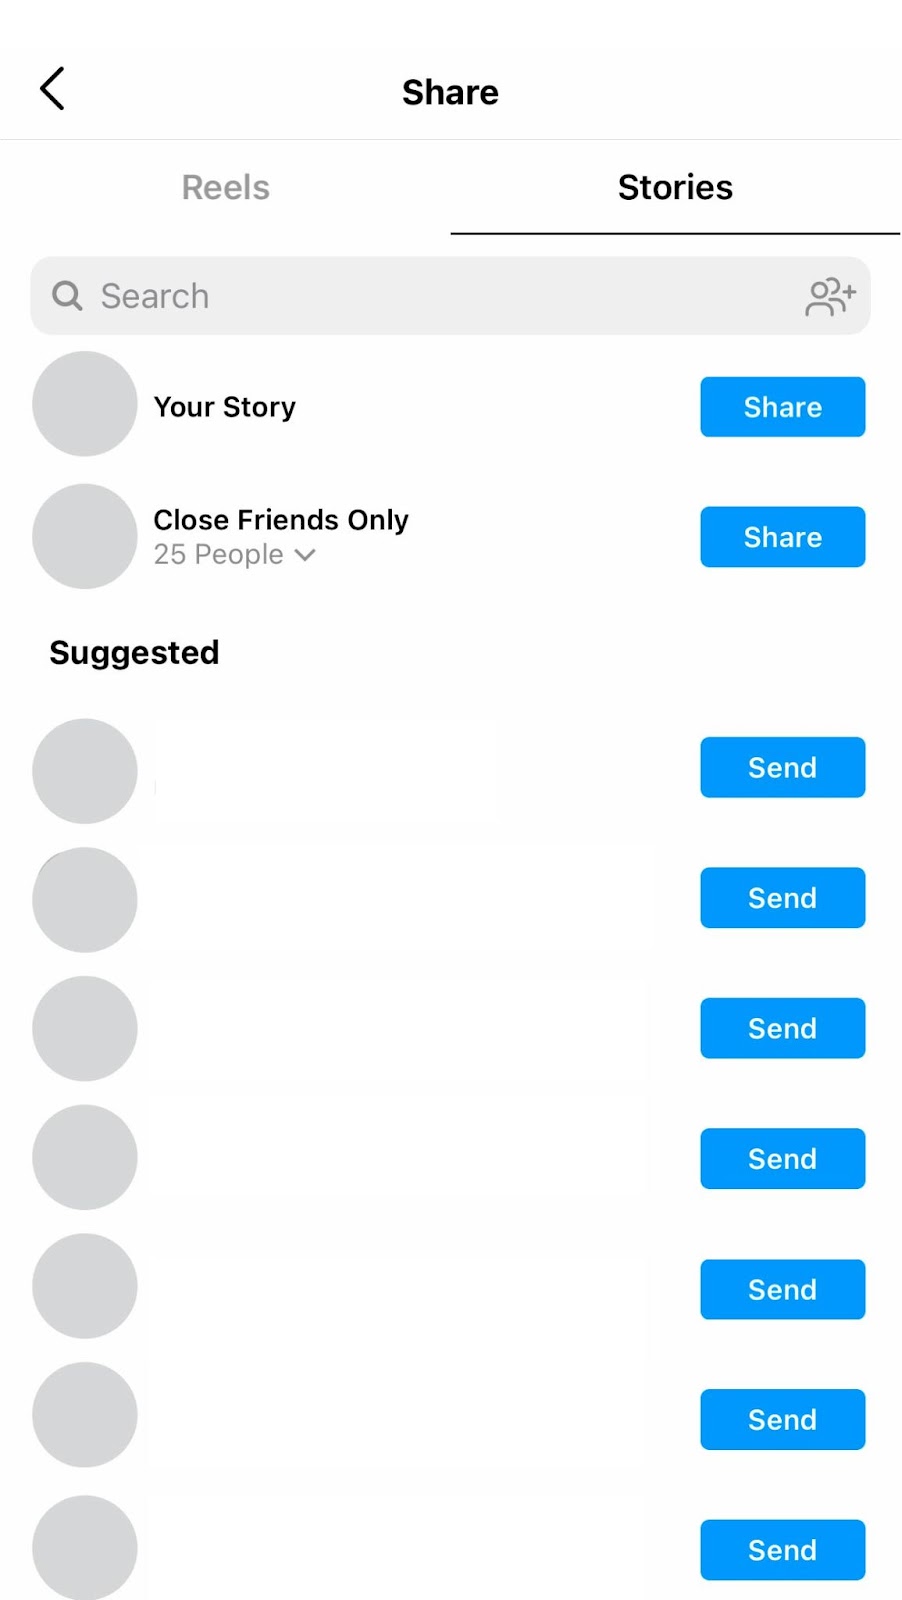
Share to Stories.
Here, you can share your Reel directly to your story, your close friends, or individual people you follow.
Instagram Stories
Instagram Stories allow users to post at a higher frequency without overposting and clogging up their main feed. Stories usually feature less-polished, more organic images and videos. Like Snapchat Stories, your Instagram Story disappears after 24 hours.
Stories are all about authenticity. While your Instagram feed should feature polished photos, Stories can be a little more experimental. Use the feature to give a behind-the-scenes look at your brand or showcase your company culture. Do you have a dog-friendly office? Share photos and videos of the dogs in your Story. Stories are also a helpful tool to showcase live events your business hosts or attends, as this feature is much more time-sensitive.
How to Post to Your Instagram Story
Instagram offers three options for posting to your Story. You can tap the camera in the upper left corner, tap Your Story above your feed, or just swipe right to access the camera.
Your camera will default to Normal, but let’s review the other camera settings that we didn’t cover above.
- Type: Creates a text post
- Music: Pairs a music clip of your choice to an image or video
- Live: Captures and publishes live content to your Instagram for your followers to watch
- Superzoom: Adds an animated zoom to a video
- Focus: Focuses on a subject and blurs the background
- Hands-Free: This allows you to capture video without having to hold the record button
Like your typical phone camera, the thunderbolt icon controls the flash and the arrow icon switches the camera view between front and forward-facing. Instagram has recently added filters (like on Snapchat) that you can access by tapping the smiling face next to the arrow icon.
Step 1: Upload your photo and add a filter.
Stories make it easy to add personality to your content! Swipe to the left or right to access the filters. Select the pen icon to choose a color and add a doodle.
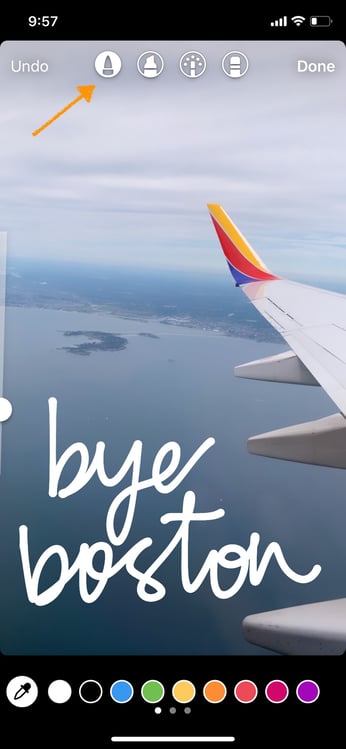
Step 2: Press the Aa icon to add text with your keyboard.
The smile icon allows you to add a location, GIF, music, poll, and many more fun features.
Instagram also allows you to tag another account in your Story, which is a great way to connect with other businesses and your followers. To tag someone, type the @ symbol followed by the username you’d like to mention. This makes the tag clickable so that viewers can visit the tagging profile. You’ll receive a notification if you’ve been mentioned in someone’s story.
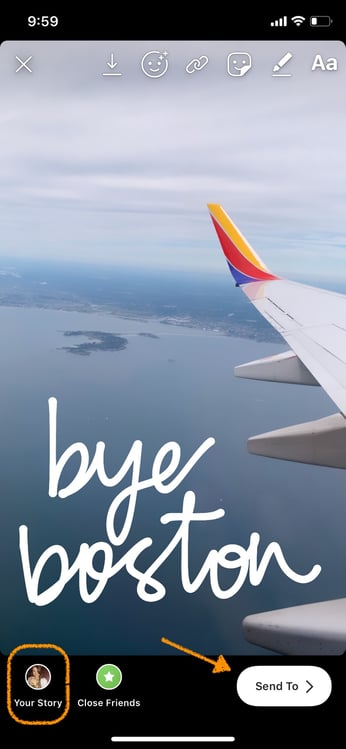
Step 3: Publish your story.
When you’re ready to publish, press the Your Story icon or save it to your camera roll to publish later. You can also tap Send To to add to your Story as well as send directly to other users. Stories appear at the top of the Instagram feed and through your profile picture. To see who viewed your content, swipe up when viewing your Story.
Instagram Stories are very similar to Snapchat — yes, Snapchat has facial recognition and Lenses (or filters). But, Instagram’s active user base combined with its search capabilities provide a great opportunity for businesses to be discovered. So if you’re wondering if your business should use Stories, the answer is “yes”.
How to Add Instagram Story Highlights
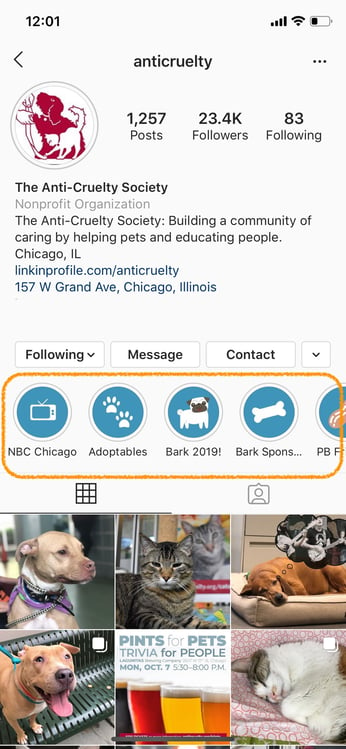
Instagram Story Highlights are Instagram Stories that have been preserved past their 24-hour limit and posted to an Instagram profile. You can find them in the small circles under an Instagram bio. Story Highlights are a fantastic way to showcase your best stories and post them semi-permanently to your account for your followers to see. They're also useful ways to showcase products, services, promotions, and more as your Highlights can include links to external sites.
Instagram Story Highlights can also serve as a menu of sorts. Many Instagram businesses use Story Highlights to post their business hours, current promotions or sales, team member or shop location information, behind-the-scenes video, and more. Because Story Highlights are located at the top of an Instagram profile, they're almost an extension of your bio. Instagram also allows you to add Highlight Covers (at 2000 x 2000 px and an aspect ratio of 1:1) to illustrate your Story Highlights and keep your profile on-brand.
There are multiple ways to add Instagram Story Highlights. It's important to note, however, that you can't add images or video directly to your Story Highlights. Your Story Highlights need to be a previously posted (or currently live) or Instagram Story before you can pin it to a Highlight (or create a new Highlight).
One way to create and/or post to a Story Highlight is with a current Instagram Story.
Add an Instagram Highlight from Story
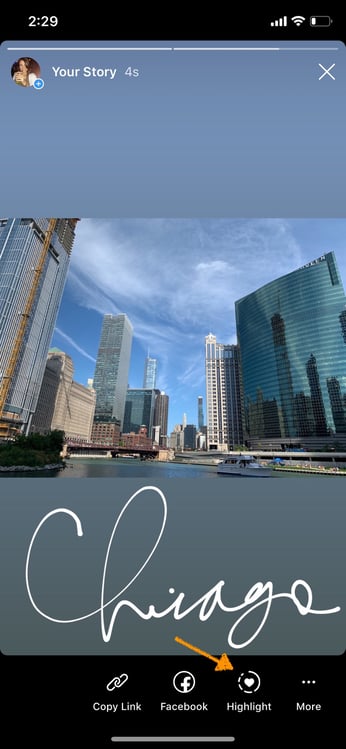
Step 1: Open your current Instagram Story and click the heart icon labeled Highlight.
At this point, Instagram will ask you which Highlight you'd like to pin the Story to, or it will ask you to create a Highlight if you don't have any yet.
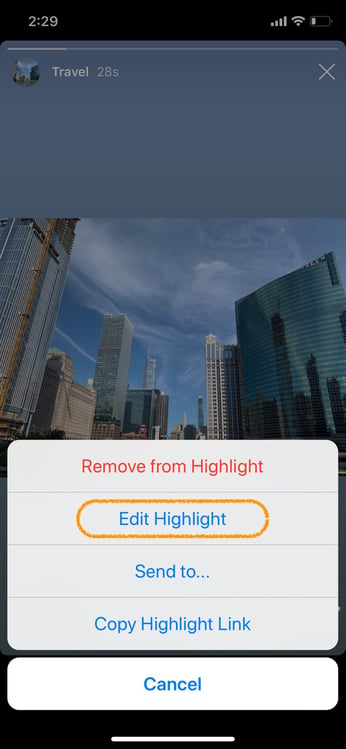
Step 2: Edit the Highlight.
Once you add the Story to an existing Highlight (or use it to create a new one), you'll see the Highlight show up on your Instagram profile, below your Instagram bio. Once posted, Story Highlights can be edited to change the cover image, pick a new name, remove posts, or even add new ones from your Story Archive (which we'll talk about next). To edit a Highlight, click the three dots at the bottom of a Story Highlight and tap Edit Highlight.
Add an Instagram Highlight from Archive
You can also create or add to Story Highlights from your Archive, which is where your Instagram Stories are saved after their 24-hour limit expires.
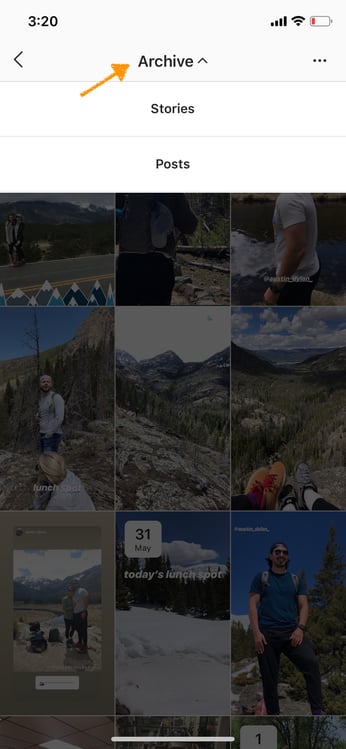
Step 1: Access the archive.
You can access your Archive by tapping the three lines in the top right corner of your profile and clicking Archive. Your Archive also includes posts that you've removed from your Instagram profile; to toggle between Posts and Stories, tap Archive in the top bar for the drop-down menu.
Step 2: Add the highlight.
From your Archive, you can choose old Instagram Stories to add to Story Highlights. Simply open an archived Story, click Highlight at the bottom menu, and choose which Highlight to add it to.
Highlights are useful ways to engage your audience by making temporary content permanent on your profile. Story Highlights are also close to your Instagram bio, making them noticeable parts of your Instagram profile. Use your Story Highlights to engage, inform, and delight your Instagram audience — much like HubSpot does.

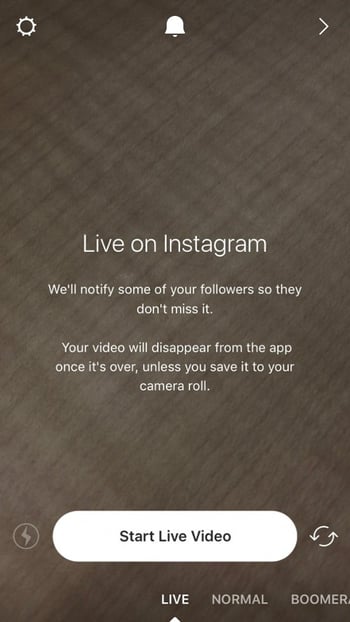
Instagram Live
As we talked about above, Instagram has a live video option that allows you to share content real-time. To start a live video stream, open the Instagram camera, swipe to the Live setting, and click the button to Start Live Video.
Once you start the live video, any followers currently on the app will receive a notification that you’re live. Live viewers can also comment on the live video using the built-in chat feature. Live video should be used sparingly to showcase exciting, real-time content or engaging moments like Q&As or reveals.