

3. Add a Short Description
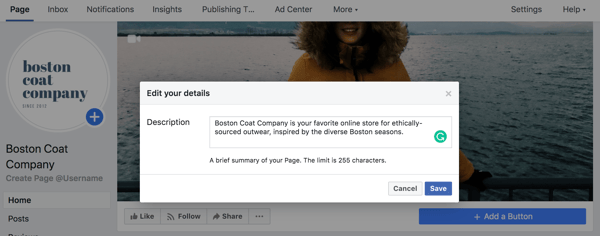
Your Page is starting to come together with some beautiful imagery. Next, you’ll need a description to let your audience know what your business is all about.
Click “Add a Short Description” under "Welcome to Your New Page"to get started. Add one to two sentences (or 255 characters max) about your business. This description will appear both on your Page and in search results, so keep it descriptive but succinct. But don’t be afraid to show a bit of your brand’s personality!
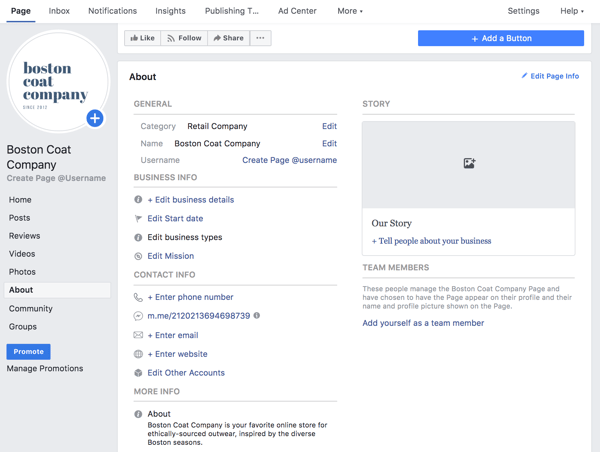
Alternatively, you can edit your description by clicking on “About” in the left menu. There you’ll find the option to include a phone number, website, email, mission, and more.
4. Create a Username for Your Page
The last step on the welcome menu is to create a username for your Page. Your username will appear in your custom Facebook URL (also known as a vanity URL) to help people easily find and remember your Page. You’ll have 50 characters to come up with a unique name not being used by another business.

By picking @thebostoncoatcompany for my sample Page, people can automatically visit my Page at fb.me/thebostoncoatcompany or send me messages at m.me/thebostoncoatcompany. Keep your Page’s unique URLs handy. You’ll use them again when you begin cross-promoting your Page on your website, blog, and other assets to get more Facebook likes.
5. Add Your Page to Shortcuts
We finished the four steps from Facebook’s welcome menu, but there are still a few things you can do to customize your Page. For example, every Facebook user has a vertical navigation bar to the left of their News Feed. By adding your Page as a shortcut here, you’ll always have easy access. Go to your News Feed and click on “Edit” next to “Shortcuts” in the left vertical navigation to make it easy to navigate to your Page in the future.
6. Set Up Page Roles
With the basic skeleton of your Page complete, there’s an important step you’ll want to take before you send the Page out to the world … or even your co-workers. Remember how Facebook creates business Pages separate from personal profiles? One benefit of this is so multiple people from an organization can edit and post from the Page without sharing login credentials. But that also means you need to designate who has what levels of editing access. That’s where Page Roles comes in.
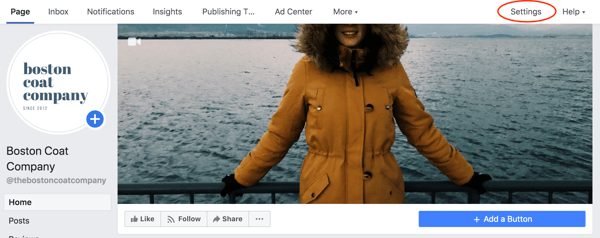
On the top navigation bar, locate “Settings.”
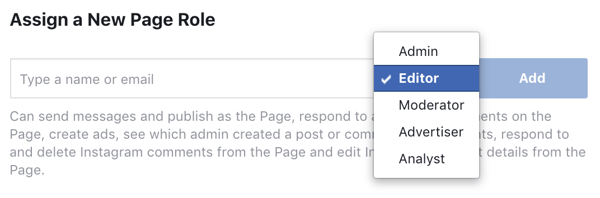
Then click on“Page Roles” in the left navigation bar. There are a few options when adding a collaborator:
- Admin: Admins can manage all aspects of the Page, meaning they can send messages, publish as the Page, respond or delete comments, create ads, see which admin published a specific post, and assign Page roles. This person would have all the same permissions as the creator of the Page. Choose wisely.
- Editor: Editors have the same permissions as Admins except for one key difference: Editors can’t assign Page roles to other people.
- Moderator: Moderators can send messages and respond to and delete comments, but they can’t publish as the Page. They do have access to create ads.
- Advertiser: Just as it sounds, Advertisers can create ads and view insights.
- Analyst: Analysts don’t have any publishing power whatsoever, but they can see which Admin published a specific post and view insights.
- Jobs Manager: Jobs Managers can do everything that an Advertiser can do as well as publish and manage jobs.
7. Customize Your Notifications
While you’re in the settings menu, jump up to “Notifications.” This section allows you to customize how you receive alerts for activity on your Page. For example, you could choose to get a notification every time there is activity or just get one notification every 12 to 24 hours.
8. Add a Page CTA
One of the top benefits of having a Facebook Page for your business is the ability to attract an audience you might not have been able to reach with a traditional website. However, the typical buyer’s journey doesn’t end on Facebook.
Starting in December 2014, Facebook allowed Pages to include a call-to-action button at the top of the Page. To create one, click “+ Add a Button” below your cover photo. You can choose from an array of choices depending on if you want view or book a service, get in touch, make a purchase or donation, download an app, or simply learn more.

Click "Next" and choose a link for the CTA to lead to, such as your homepage, Messenger, a landing page, or a video.
9. Organize Your Page Tabs
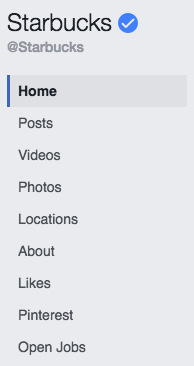
Want to take your business Page to the next level? Add custom tabs to tailor what content users see when they visit your Page. For example, when you visit Starbucks’ Page, there’s an option to browse photos, see open jobs, visit its Pinterest account, or find a store near you.
To change the tabs on your Page, go to "Settings" > “Templates and Tabs”. You can choose to use Facebook's default tabs, or you can add additional ones. You can also create a custom app via the Facebook Developer portal.
10. Verify Your Page
Have you ever noticed a tiny gray or blue check mark next to the names of some businesses and brands?

Depending on how you categorized your Page, you could be eligible for a verification badge. A blue badge means that Facebook has confirmed an authentic Page for a public figure, media company or brand. Agray badge means that Facebook has confirmed an authentic Page for a business or organization.
A verification badge is by no means necessary, but it does add a sense of authority to your Page and business. This could be particularly important for businesses in ecommerce or online services looking to build trust with potential customers and initiate transactions online.
To ensure you're eligible, confirm that your Page has a profile picture and cover photo. Go to “Settings” > "General". There you’ll find “Page Verification” where you can enter your publicly listed phone number, country, and language. You'll receive a call with a verification code.
The blue check badge is only available to some public figures, celebrities, and brands. Unfortunately, it’s not possible to request a blue badge.